
How to Replace a Diesel Fuel Injector – 7-Step Complete Guide
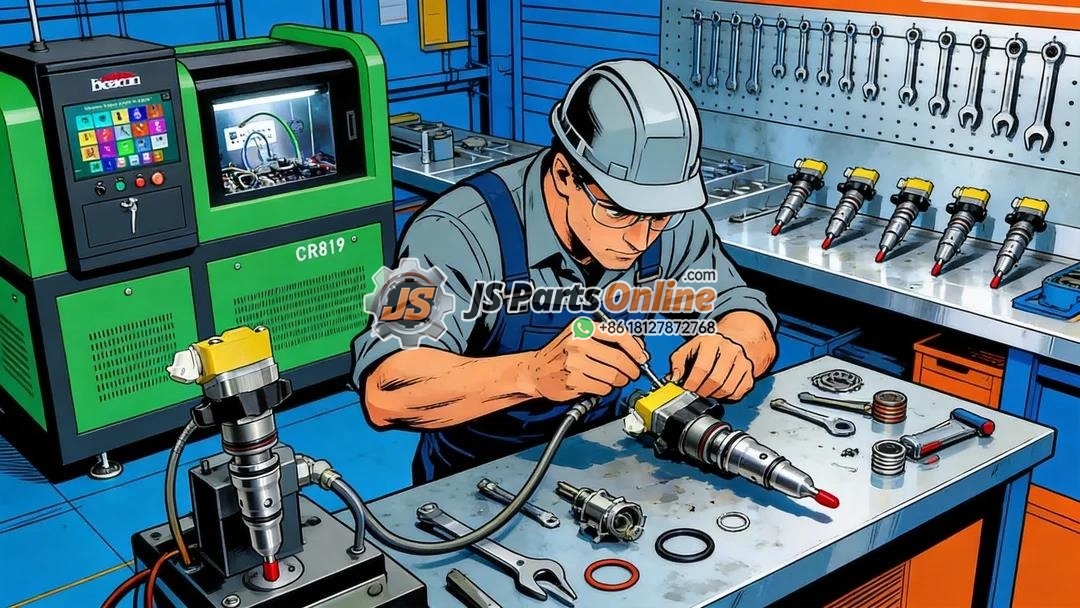
So you’ve diagnosed the problem. The injector is misfiring, return flow is excessive, and fuel dilution has contaminated your engine oil. Cleaning won’t save it — this injector needs to come out. How to replace a diesel fuel injector is the next skill every diesel owner and technician must master. Whether you’re swapping a single injector on a CAT C7 or doing a full set on a Cummins ISX, the process follows a logical sequence that, when done correctly, restores your engine to factory performance. This 7-step guide covers everything from preparing your workspace to performing the critical ECU calibration that modern common rail systems require after injector replacement.
When Replacement Is the Right Call
Before you pull any injectors, confirm that replacement is the right decision. Fuel injector replacement is warranted when:
- High return flow – Leak-off test shows one or more injectors returning significantly more fuel than the others
- Electrical failure – Open or short circuit detected on the injector solenoid (fault codes P0201–P0212)
- Mechanical damage – Broken nozzle tip, bent injector body, or seized plunger
- Excessive mileage – Over 300,000 miles on original injectors with multiple performance symptoms
- Cleaning failed – Symptoms returned within a few thousand miles after a professional cleaning
- Fuel dilution confirmed – Laboratory oil analysis shows more than 3% fuel in the engine oil
If any of these conditions apply, proceed with confidence. If you’re still unsure, revisit our guides on diesel fuel injector diagnosis and injector cleaning before committing to replacement.
Safety First: Preparation and Precautions
Diesel fuel injection systems operate at extreme pressures — modern common rail systems run between 20,000 and 37,000 PSI. Even after the engine is off, residual pressure remains trapped in the fuel rail and lines. Failure to relieve this pressure before disassembly can result in severe injury from a high-pressure diesel injection.
Essential safety equipment:
- Safety glasses with side shields
- Heavy-duty mechanic’s gloves (nitrile or latex under mechanic’s gloves for diesel resistance)
- Fire extinguisher rated for fuel fires (Class B)
- Adequate ventilation — diesel fumes and cleaning solvents are toxic in confined spaces
- Absorbent pads or kitty litter for fuel spills
Step 1: Relieve Fuel System Pressure
This is the single most important safety step. Skipping it can cause severe injury.
- Ensure the engine is cold — never work on a hot fuel system
- Disconnect the battery (negative terminal first, positive second)
- Locate the fuel pressure relief valve on the fuel rail (usually a small Schrader valve or hex plug)
- Place a catch pan and absorbent cloth under the valve
- Slowly open the relief valve or loosen the banjo bolt — fuel will spray with considerable force
- Wait until fuel flow stops completely before proceeding
For common rail systems without a relief valve: Crank the engine for 10–15 seconds with the fuel pump fuse or relay removed. This consumes the residual rail pressure without starting the engine.
Step 2: Remove Components Blocking Access
Modern engines pack components tightly around the injectors. You’ll likely need to remove several parts to gain clear access.
- Engine cover – Usually held by bolts or push clips
- Intake manifold – On V-configuration engines, the intake sits directly above the injectors on some platforms
- Fuel return line – The manifold that connects all injector return ports
- High-pressure fuel lines – The steel lines connecting the fuel rail to each injector. Mark their positions before removal — they are position-specific and must return to the exact same cylinder
- Electrical harness – Disconnect injector solenoid connectors and zip-tie the harness out of the way
As you remove each component, place fasteners in labeled bags or use a magnetic parts tray. A single misplaced bolt can turn a two-hour job into an all-day search.
Step 3: Remove the Old Injectors
With everything clear, it’s time to extract the old injectors. This step requires patience — injectors that have been in service for hundreds of thousands of miles can be stubbornly seized in their bores.
- Clean the area – Use compressed air and brake cleaner to blow debris away from the injector base. Dirt entering the injector bore will cause premature seal failure on the new injector.
- Loosen the hold-down bolt – Most injectors are secured by a single clamp bolt. Loosen it gradually — do not remove it completely until you confirm the injector is free.
- Apply penetrating oil – Spray around the injector base and let it soak for 10–15 minutes if the injector feels stuck.
- Use a slide hammer or injector puller – Attach the puller tool to the injector body. Apply steady, even pressure. Do not jerk or slam — you risk breaking the injector body in half, which turns a simple replacement into a cylinder head removal job.
- Remove the hold-down bolt and clamp – Once the injector starts moving, remove the clamp and continue pulling.
- Inspect the bore – After removal, use a bore brush and shop vacuum to clean the injector bore. Look for scoring, corrosion, or carbon buildup. If the bore is damaged, consult a machine shop before installing a new injector.
Repeat this process for each injector you plan to replace. If you’re replacing only one injector on a multi-cylinder engine, it’s strongly recommended to replace all injectors in the same bank or — ideally — as a complete set. Mismatched injector flow rates cause imbalanced cylinder power output and can trigger misfire codes even with new parts.
For replacement injectors compatible with your engine, browse our CAT diesel fuel injectors, Bosch injectors, and Denso injectors — each verified to meet OEM flow specifications.
Step 4: Prepare and Install New Injectors
Proper preparation before installation is what separates a long-lasting injector replacement from one that fails within months.
Pre-Installation Checklist
- Verify part numbers – Confirm each new injector matches the OEM part number for its cylinder position
- Compare injector codes – Many common rail injectors have an IMA (Injector Manufacturing Adjustment) code or QR code. These codes contain calibration data that the ECU needs. Write each injector’s code down before installation
- Install new copper washers – Always use new copper sealing washers. The old one is crushed and will not reseal
- Apply anti-seize compound – Lightly coat the injector body (NOT the nozzle tip) with copper anti-seize to prevent future seizure
- Install new O-rings – Lubricate O-rings with clean engine oil or assembly lube. Never install dry O-rings
Installation
- Insert the injector straight into the bore — do not tilt or force it
- Seat it fully using hand pressure only. If it doesn’t seat fully by hand, remove and check for debris
- Install the hold-down clamp and bolt
- Tighten the hold-down bolt to manufacturer specifications using a torque wrench. Over-tightening distorts the injector body and causes internal binding. Under-tightening causes combustion gas blow-by and seal failure. Typical torque values range from 15–25 Nm for most common rail injectors — always verify with the service manual
Step 5: Reassemble the Fuel System
Reassembly is the reverse of disassembly, but attention to detail matters enormously.
- Reinstall high-pressure fuel lines – Always use new copper sealing washers on each banjo fitting. Tighten fittings in sequence following the fuel flow direction
- Replace the fuel return line – Check the rubber return line hoses for cracks or hardening. Replace them if there’s any doubt — a pin-hole leak in the return system causes hard starting and air intrusion
- Reconnect all electrical connectors – Push each connector until you hear the locking tab click. A loose injector connector causes intermittent misfire that’s extremely difficult to diagnose
- Replace the fuel filter – New injectors deserve clean fuel. Install a fresh fuel filter before starting the engine
- Reinstall all removed components – Intake manifold, engine cover, air intake tubes — everything goes back in the reverse order of removal
Step 6: Bleed the Fuel System and Perform Leak Check
Air in the fuel system will prevent the engine from starting. Bleed the system thoroughly before the first startup attempt.
- Fill the fuel filter housing with clean diesel before installing the filter (pre-filling reduces cranking time)
- Turn the ignition key to the “ON” position for 10–15 seconds to prime the system
- Repeat the prime cycle 4–5 times
- If the engine has a manual primer pump (common on CAT and Cummins engines), pump it until resistance builds
- Crank the engine. It may take 15–30 seconds of cranking to clear all air. Do not crank continuously for more than 30 seconds — rest 2 minutes between attempts
- Once started, let the engine idle and visually inspect every fuel fitting for leaks. A tiny drip at a high-pressure line is a fire hazard and must be tightened immediately
Warning: If the engine starts and immediately runs rough, then stops, air is still trapped in the rail. Repeat the priming procedure. Persistent air intrusion after multiple attempts points to a suction-side leak between the tank and the lift pump.
Step 7: ECU Calibration (Common Rail Systems Only)
This step is mandatory for modern common rail diesel engines equipped with electronically controlled injectors. If you skip it, your new injectors will not deliver the correct fuel quantity, and the engine will run poorly or set fault codes.
What is IMA / QR coding? Every common rail injector is flow-tested at the factory and assigned a calibration code that compensates for minor manufacturing variations. The ECU stores this code and uses it to adjust injection timing and duration for each individual cylinder. When you install a new injector without entering its code, the ECU continues using the old injector’s calibration data — which is incorrect for the new unit.
How to program injector codes:
- Connect a manufacturer-level diagnostic tool (CAT ET, Cummins Insite, Bosch ESI[tronic], or a high-end aftermarket tool like Autel or Launch)
- Navigate to the injector coding / IMA programming menu
- Enter the injector adjustment code printed on each new injector
- Verify the codes are accepted — the tool should confirm “Injector Coding Successful”
- Optionally, perform an injector cutout test to confirm all cylinders are contributing evenly
Some engines (e.g., CAT C7 and C9 with HEUI systems) do not require injector coding — the calibration is mechanical. Consult your service manual or contact our technical team if you’re unsure whether your engine requires coding.
Post-Installation Checks and Break-In
After the engine starts and runs smoothly, complete these final checks:
- Road test – Drive the vehicle under varied conditions (idle, cruise, acceleration) for 20–30 minutes
- Recheck fuel fittings – Temperature changes during the first drive can loosen fittings. Re-torque any that feel loose
- Monitor fuel economy – A successful injector replacement should restore normal fuel consumption within the first tank. Track it for comparison
- Check engine oil level and condition – If you replaced injectors due to fuel dilution, change the engine oil and filter after 500 miles to flush any remaining diesel contamination
- Scan for fault codes – After 100 miles of driving, perform a final scan to ensure no injector-related codes have appeared
Common Mistakes to Avoid
| Mistake | Consequence | Prevention |
|---|---|---|
| Skipping fuel pressure relief | Injury from high-pressure diesel spray | Always follow Step 1 — never skip pressure relief |
| Reusing copper sealing washers | Compression leak, combustion blow-by, injector overheating | Replace all copper washers and seals with every injector |
| Installing dry O-rings | O-ring cuts on installation, immediate fuel leak | Lubricate all O-rings with clean engine oil |
| Not recording IMA codes before install | Cannot complete ECU calibration, engine runs poorly | Write each injector code down before installation |
| Mixing up high-pressure line positions | Line stress, cracking, or improper seating at the injector | Mark each line at removal; never swap positions |
| Skipping torque wrench on hold-down bolts | Under-tightening: injector movement and seal failure. Over-tightening: body distortion and internal binding | Use a calibrated torque wrench at all times |
| Replacing only one injector without flow matching | Imbalanced cylinders, persistent vibration, misfire codes | Replace injectors in complete sets when possible |
Conclusion
Knowing how to replace a diesel fuel injector is an essential skill for anyone who owns or maintains diesel-powered equipment. When performed correctly — with proper pressure relief, careful extraction, meticulous preparation of new injectors, and mandatory ECU calibration on common rail systems — a fuel injector replacement restores your engine’s power, fuel economy, and reliability to like-new condition.
The process is not difficult, but it demands patience and precision. Rushing any step — especially the torque specifications and injector programming — will compromise the results. If at any point you feel uncertain about a step, don’t hesitate to consult a professional diesel technician. The cost of professional guidance is far less than the cost of a damaged cylinder head or a towing bill.
When you’re ready to purchase replacement injectors, JSPartsonline.com offers a comprehensive selection of OEM-quality diesel fuel injectors for CAT, Bosch, Denso, Delphi, Cummins, and Volvo applications. Every injector is tested and guaranteed to meet OEM specifications. Whether you need a single CAT injector for your C7, C9, or C15 or a complete set of Bosch common rail injectors, we ship same day from our US warehouse.
Replace right, replace once. Your diesel engine will thank you.



JSPartsonline:
Focus on injectors for 12 years,We sell high-quality fuel injectors at competitive prices.
Copyright 2025 © YUN·X . All right reserved.
