
Diesel Fuel Injector Nozzle Replacement — Complete Guide to Replacing Injector Nozzles
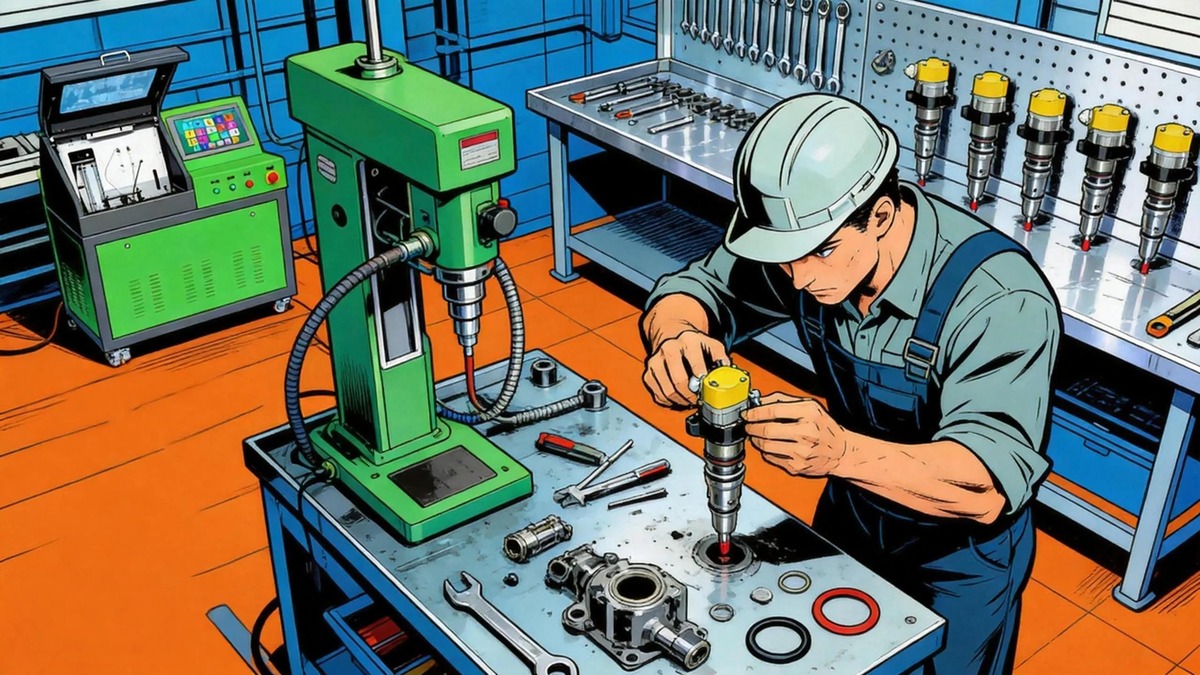
The injector nozzle is the most critical wear component in any diesel fuel injection system. It is the final precision component that fuel passes through before entering the combustion chamber, and its condition directly determines spray pattern quality, atomization efficiency, and ultimately engine performance and emissions. In the image above, a selection of diesel injector nozzles and associated components are shown on a technician’s workbench — a common sight in shops that regularly perform nozzle replacement services. This guide covers everything you need to know about diesel fuel injector nozzle replacement, including when to replace nozzles, how to select the correct replacement, the step-by-step replacement procedure for Bosch injectors, Denso injectors, Delphi injectors, and CAT injectors, and how to verify proper nozzle function after replacement.
What Is an Injector Nozzle and How Does It Work?
The injector nozzle is the component at the tip of the fuel injector that meters and atomizes fuel into the combustion chamber. It consists of two precision-mated parts: the nozzle body (which contains the spray orifices) and the nozzle needle (which opens and closes the orifices). When the injector solenoid or piezo actuator lifts the nozzle needle off its seat, high-pressure fuel escapes through the tiny orifices at the tip, creating a finely atomized spray that mixes with compressed air for efficient combustion.
Nozzle designs vary by injector type and application. Key design parameters include:
- Number of spray holes — Typically 5–12 holes in modern common rail injectors. More holes generally produce finer atomization
- Hole diameter — Ranges from 0.10mm to 0.25mm depending on engine power requirements
- Spray angle — The cone angle of the fuel spray, typically 140°–160° for direct injection engines
- Flow rate (cc/min) — The amount of fuel the nozzle can deliver at a given pressure, measured in cubic centimeters per minute at 100 bar
- Nozzle type — Sac-hole, VCO (Valve Covered Orifice), or micro-sac designs, each with different emission characteristics
When to Replace Injector Nozzles
Injector nozzles are wear items. Over time, the extreme pressures and temperatures in the combustion chamber degrade the nozzle orifices and needle seat. Here are the signs that nozzle replacement is needed:
| Symptom | Cause | Severity |
|---|---|---|
| Engine misfire at idle | Carbon buildup partially blocking one or more spray holes | Moderate — replace soon |
| Excessive black smoke under load | Worn holes delivering oversized fuel droplets that don’t atomize fully | High — replace immediately |
| White smoke at cold start | Dribbling nozzle — needle not seating fully, fuel leaks past the seat | High — replace immediately |
| Hard starting / long crank time | Nozzle opening pressure too low from seat wear | Moderate to high |
| Reduced fuel economy (10%+ drop) | Poor atomization reduces combustion efficiency | Moderate — replace at convenience |
| Engine knock or rough running | Uneven spray from worn or partially blocked orifices | High — replace immediately |
| High in-cylinder pressure variation | Cylinder-to-cylinder variation from unmatched nozzle flow rates | Moderate |
| Excessive fuel in engine oil | Dribbling nozzle allows fuel to wash past piston rings into the crankcase | Critical — replace immediately, change oil |
Nozzle Types and Compatibility
Selecting the correct nozzle replacement is critical. Using the wrong nozzle can damage the engine, reduce performance, or cause emissions compliance failures.
Common Nozzle Types
| Nozzle Type | Description | Common Applications | Advantages | Disadvantages |
|---|---|---|---|---|
| Sac-hole (standard) | Small sac volume below the needle seat with spray holes drilled through the sac wall | Bosch CRIN, Denso HP3, early common rail systems | Simple design, widely available, lower cost | Sac volume contributes to unburned HC emissions |
| VCO (Valve Covered Orifice) | Needle closes directly over spray holes — no sac volume | Bosch CRIN 2nd gen, Delphi F2P | Near-zero sac volume = lower emissions | More complex, higher manufacturing cost |
| Micro-sac | Minimized sac volume — intermediate between sac-hole and VCO | Bosch CRIN 3rd gen, Denso HP4/HP5 | Balance of emissions and durability | Specialized replacement required |
| Step-hole / micro-orifice | Smaller secondary orifice inside a larger primary orifice | High-performance common rail applications | Better atomization at low pressure | Increased manufacturing complexity |
Nozzle Sizing and Flow Rates
Nozzles are specified by their flow rate, typically measured in cc/min at 100 bar. Choosing the correct flow rate is essential for proper engine operation:
- Stock replacement — Always use the same flow rate as the original equipment. The flow rate is part of the nozzle’s OEM specification and is matched to the engine’s fuel injection strategy
- Performance upgrades — Increasing nozzle flow rate (e.g., from 150cc to 200cc) can increase power but requires ECU tuning to match the increased fuel delivery. Without tuning, the engine will run excessively rich, producing smoke, high EGTs, and potential engine damage
- Matched sets — When replacing nozzles, always replace all nozzles in a set. Nozzle-to-nozzle flow variation must be within ±2% for proper cylinder balance. Manufacturers grade nozzles into flow classes — always select the same class
Nozzle Replacement Procedure
Replacing an injector nozzle is a precision operation. The following procedure applies to most common rail injector designs, but specific steps may vary by manufacturer. For complete injector rebuild procedures, see our diesel injector rebuild guide.
Tools Required
- Torque wrench (inch-pound range, calibrated)
- Deep socket for nozzle retaining nut (typically 14mm, 17mm, or 19mm depending on injector)
- Nozzle nut socket — purpose-built thin-wall socket that fits around the nozzle nut without damaging the body
- Injector holding fixture — prevents injector body rotation during disassembly
- Brass or plastic pick set — for O-ring and seal removal without scratching surfaces
- Digital calipers and micrometer — for measuring shims and component dimensions
- Magnifying lamp or microscope — for inspecting nozzle needle and orifice condition
- Clean lint-free cloths and solvent
Step-by-Step Procedure
Step 1: Remove the Injector from the Engine
If the injector is still installed in the engine, remove it following the manufacturer’s procedure. Refer to our diesel injector installation guide for proper removal and reinstallation procedures.
Step 2: Clean the Injector Exterior
Thoroughly clean the injector body before beginning disassembly. Use solvent and a lint-free cloth. Pay special attention to the area around the nozzle retaining nut — this is where debris could enter the injector during disassembly. Do not use compressed air near the nozzle tip as it can embed particles in the spray holes.
Step 3: Test Before Disassembly (Recommended)
If you have access to a common rail injector test bench, test the injector before disassembly as described in our test bench guide. Record the injection quantity, opening pressure, spray pattern, and back leakage. This data is valuable for diagnosing the root cause of nozzle failure and confirming that the new nozzle has solved the problem.
Step 4: Disassemble the Nozzle Assembly
- Secure the injector body in the holding fixture — ensure firm clamping without damaging the injector body
- Loosen the nozzle retaining nut using the appropriate socket. On some injectors, the nozzle nut is torqued to 60–100 Nm. Use a smooth, steady motion — sudden jerks can damage the internal needle
- Remove the nozzle retaining nut completely
- Carefully extract the nozzle body from the injector. If it sticks, gently tap the nozzle nut threads to break the carbon seal
- Remove the nozzle needle from the nozzle body. Place both immediately in a clean container filled with diesel fuel — precision surfaces must never be allowed to dry
- Remove any shims, spacers, or springs that sit above the nozzle needle. Note their positions and orientations
Step 5: Inspect the Old Nozzle
Examine the old nozzle under magnification to confirm your diagnosis:
- Spray hole erosion — Look for ovalization or enlargement of the spray holes, especially at the hole entrance
- Needle seat wear — A worn seat shows as a bright ring or pitting on the conical seat surface
- Carbon deposits — Heavy carbon around the nozzle tip indicates incomplete combustion or injector dribble
- Needle sticking — Scuffing or scoring on the needle guide surface indicates insufficient lubrication or contamination
- Thermal damage — Discoloration (blueing) of the nozzle tip indicates excessive temperature from extended injection or poor heat transfer
Step 6: Clean the Injector Body
With the nozzle removed, clean the injector body’s internal fuel passages. Use an ultrasonic cleaner with professional-grade injector cleaning solution for 10–15 minutes at 40–50°C. After ultrasonic cleaning, rinse with clean diesel fuel and dry with filtered compressed air. Pay special attention to the high-pressure fuel inlet passage and the nozzle nut threads — both must be completely clean before reassembly.
Step 7: Install the New Nozzle
- Remove the new nozzle from its packaging. Inspect it under magnification for any shipping damage, burrs, or contamination
- Submerge the new nozzle body and needle in clean diesel fuel — this provides initial lubrication and allows you to check for proper needle movement (the needle should slide freely in the body under its own weight)
- Install any required shims or spacers above the nozzle needle. Shim thickness selection may need to be adjusted to achieve the correct nozzle opening pressure — use original shim thickness as a starting point
- Insert the nozzle needle into the nozzle body
- Place the nozzle assembly into the injector body. Ensure correct alignment — most nozzles have an alignment pin or flat that orients the spray pattern
- Install the nozzle retaining nut and hand-tighten
- Torque the nozzle retaining nut to manufacturer specification — typically 60–100 Nm depending on injector model. Apply torque in two or three stages: 50%, 75%, then 100%
Step 8: Verify Nozzle Operation
- Spray pattern check — On a test bench or pop tester, actuate the nozzle and observe the spray pattern. The spray should form a symmetrical cone with no streaks, drips, or asymmetric patterns. All spray holes should be active and produce uniform spray plumes
- Opening pressure check — Verify that the nozzle opens at the correct pressure. Standard common rail injector nozzles typically open at 200–350 bar. If opening pressure is too low, increase shim thickness. If too high, decrease shim thickness
- Seat tightness check — Apply pressure just below the opening pressure and hold for 10 seconds. No fuel should drip from the nozzle tip. Any dripping indicates a leaking needle seat — the nozzle assembly must be replaced
- Back leakage check — Measure the return fuel flow from the injector. Excessive back leakage indicates a worn control valve, not a nozzle problem
Nozzle Selection Guide by Brand
| Brand | Common Nozzle Types | Spray Holes | Hole Diameter | Flow Rate (cc/min @ 100 bar) | Typical Applications |
|---|---|---|---|---|---|
| Bosch | DSLA, DLLA, VCO | 6–9 | 0.12–0.20mm | 120–350 | Passenger cars, light trucks, heavy-duty trucks |
| Denso | DN series, micro-sac | 6–10 | 0.10–0.18mm | 100–300 | Toyota, Hino, Isuzu, various Asian makes |
| Delphi | F2P (VCO), F2E | 7–12 | 0.10–0.16mm | 80–280 | Ford, Opel, Renault, various European makes |
| CAT | Common rail, mechanical | 6–8 | 0.15–0.25mm | 150–400 | CAT C7, C9, C13, C15 engines |
| Cummins | XPI, CELECT | 7–9 | 0.12–0.20mm | 130–350 | Cummins ISX, ISB, ISL engines |
| Siemens/VDO | Piezo flat nozzle | 6–8 | 0.10–0.16mm | 90–250 | Volkswagen, BMW, Audi passenger diesels |
Common Nozzle Replacement Mistakes
| # | Mistake | Consequence | Prevention |
|---|---|---|---|
| 1 | Replacing a single nozzle instead of the full set | Cylinder-to-cylinder flow imbalance, engine vibration, reduced power | Always replace all nozzles in matched sets |
| 2 | Using the wrong nozzle flow rate | Engine runs too rich or too lean; potential engine damage | Verify OEM flow rating before ordering replacements |
| 3 | Contaminating the new nozzle during installation | Premature nozzle failure, sticking needle, poor spray pattern | Submerge nozzle in clean diesel fuel; use lint-free materials |
| 4 | Incorrect nozzle nut torque | Under-torque = fuel leaks; Over-torque = nozzle body distortion, needle binding | Use a calibrated torque wrench at manufacturer specification |
| 5 | Not checking the spray pattern after replacement | Bad nozzle goes undetected until installed in the engine | Always perform a pop test or bench test before installation |
| 6 | Reusing old nozzle nut | Nozzle nut can stretch; reduced clamping force | Replace nozzle nut if specified by manufacturer |
| 7 | Mixing up nozzles between injectors in a set | Shim and flow settings get mixed; each cylinder gets wrong calibration | Keep each injector’s components together during service |
| 8 | Skipping the opening pressure verification | Nozzle may open at wrong pressure, causing poor spray atomization | Always verify opening pressure on a test bench |
Nozzle Replacement vs. Complete Injector Replacement
One of the most common questions is whether to replace just the nozzle or the entire injector. Here’s a decision framework:
| Scenario | Recommendation | Rationale |
|---|---|---|
| Only the nozzle tip shows wear; solenoid and control valve are good | Replace nozzle only | Cost-effective; other components still have service life remaining |
| Injector has high mileage (>300,000 miles or 500,000 km) | Consider complete injector replacement | Internal wear (plunger, control valve, solenoid) is likely; a new nozzle on a worn injector body restores only partial performance |
| One injector failed; others are low mileage | Replace nozzle on failed injector | Match the remaining injectors — but verify flow rate matches within ±2% |
| Multiple injectors have failed in the same engine | Replace all injectors (or rebuild with new nozzles + internal components) | A systemic issue (fuel quality, maintenance) will affect all injectors |
| Injector has a failed solenoid or piezo actuator | Replace complete injector | Nozzle replacement won’t fix electrical failure, and actuator replacement requires specialized equipment |
| Preventive maintenance (no symptom yet, but high hours) | Nozzle replacement as part of a full injector rebuild | New nozzles + O-rings + internal seals restore injector to near-new condition |
Conclusion
Injector nozzle replacement is one of the most effective ways to restore diesel engine performance and fuel economy at a reasonable cost. The nozzle is the final precision component in the fuel delivery system, and its condition directly affects combustion quality, power output, emissions, and fuel consumption. When replacing nozzles, always use matched sets of OEM-quality or equivalent replacement nozzles, follow proper disassembly and assembly procedures, verify the spray pattern and opening pressure on a test bench, and torque all fasteners to manufacturer specifications. A properly executed nozzle replacement — combined with a full injector rebuild including new seals, O-rings, and calibration — can restore an injector to 95–100% of its original performance at a fraction of the cost of a brand-new injector.
Looking for high-quality Bosch injector nozzles, Denso injector nozzles, or complete CAT injectors? Shop JSPartsonline for OEM-grade replacement parts with fast shipping and competitive pricing.





JSPartsonline:
Focus on injectors for 12 years,We sell high-quality fuel injectors at competitive prices.
Copyright 2025 © YUN·X . All right reserved.
