
How Diesel Injectors Are Professionally Tested & Calibrated: Complete Workshop Guide
Introduction
When a diesel injector comes out of an engine, it doesn’t go straight back onto a shelf and into another truck. It goes through a rigorous, multi-stage testing and calibration process that separates professional remanufacturing from guesswork. Understanding what happens on that test bench — and what the numbers actually mean — is essential for anyone buying, selling, or installing replacement diesel injectors.
In this guide, we’ll walk through every stage of professional diesel injector testing: from the moment an injector arrives at the workshop to the final calibration data sheet. Whether you’re a fleet maintenance manager evaluating a reman supplier, or a technician wanting to understand what those test bench printouts really tell you, this article covers it all.
Why Professional Injector Testing Matters
Modern common rail diesel injectors operate at pressures exceeding 2,000 bar (30,000 psi) and fire with microsecond-level timing precision. After tens of thousands of miles, internal wear affects:
- Fuel delivery volume: A 2-3% deviation between cylinders can cause rough idle, increased emissions, and DPF regeneration issues
- Spray pattern: Worn nozzle holes produce uneven atomization, leading to incomplete combustion and piston crown damage
- Response time: Sluggish solenoid or piezo actuator response throws off injection timing
- Back-leakage: Excessive internal fuel return reduces rail pressure and starves other injectors
Installing an untested injector is like installing a used connecting rod without measuring it. The result might be fine — or it might cost you an engine.
Stage 1: Visual Inspection & Pre-Test Assessment
Before an injector ever touches the test bench, it undergoes a detailed visual inspection. Technicians check for:
| Inspection Point | What Technicians Look For | Severity |
|---|---|---|
| Nozzle tip | Carbon buildup, erosion around spray holes, mechanical damage to needle seat | Critical — damaged tip = reject core |
| Injector body | Cracks, corrosion, thread damage on high-pressure inlet | Critical — pressure vessel integrity |
| Solenoid/actuator connector | Bent pins, corrosion, cracked connector housing | High — electrical failure risk |
| O-ring grooves | Pitting, corrosion, previous seal damage embedded in groove | Medium — can be cleaned or machined |
| Return line fitting | Cracks, stripped threads, blockage | Medium — replaceable component |
| Identification plate | Part number legibility, cross-reference verification | Low — information only |
Injectors that pass visual inspection proceed to ultrasonic cleaning. Those with critical defects are rejected as cores — the customer is informed and a replacement core or new unit is sourced.
Stage 2: The Injector Test Bench — How It Works
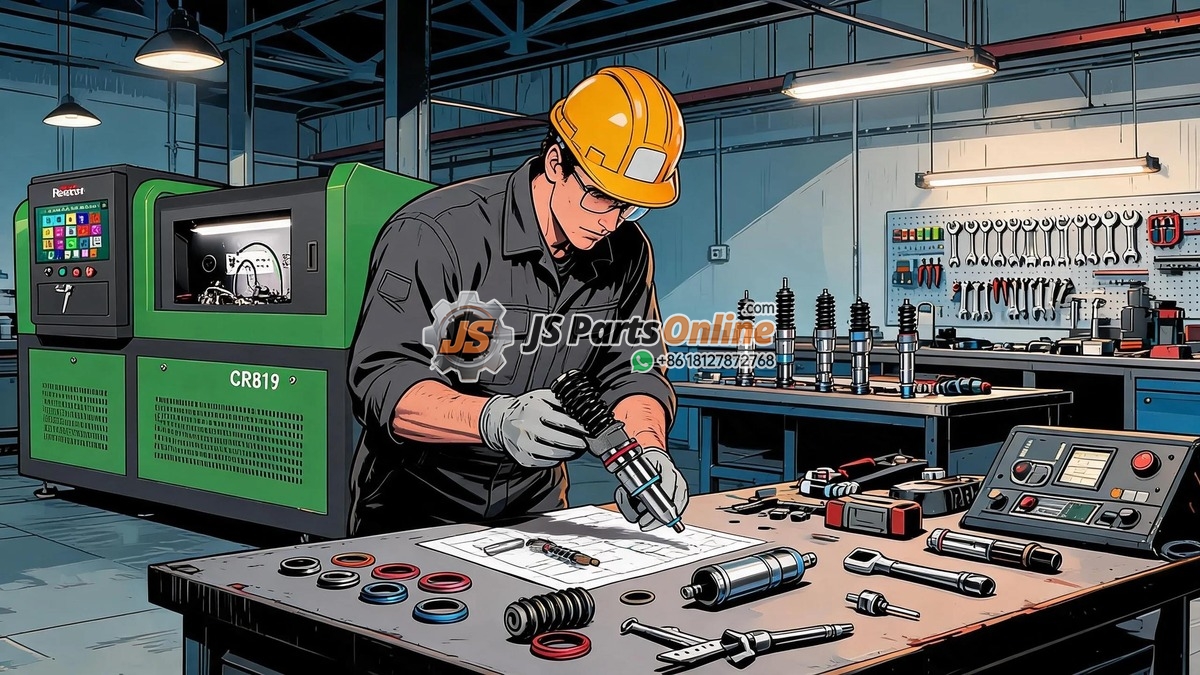
The test bench is the heart of any professional diesel injection workshop. Popular models include the CR819, Bosch EPS815, Hartridge CRi-PC, and Delphi Sealed Rail Test Stand. Despite brand differences, all professional test benches share the same core functionality:
Key Test Bench Components
- High-pressure pump: Generates rail pressure from 200 to 2,500+ bar, precisely controlled by a PCU (Pressure Control Unit)
- Common rail accumulator: Dampens pressure pulses and supplies stable pressure to the injector under test
- Injector mounting fixture: Clamps the injector securely, connecting fuel inlet, return line, and electrical connector
- Measuring glass burettes: Graduated cylinders that collect injected fuel for volume measurement — the traditional and still most trusted method
- Electronic flow meters: Modern digital sensors that measure injection volume in real-time with 0.1mm³ accuracy
- Stroboscope/camera system: Captures spray pattern images at specific crank angles for nozzle evaluation
- Control computer: Runs the test program, sends injector drive pulses, and records all measurements
Stage 3: The Standard Test Cycle — What Gets Measured
A complete test cycle runs the injector through multiple operating conditions that simulate real engine operation. Here’s what a typical test program measures:
| Test Phase | Conditions | What’s Measured | Pass Criteria |
|---|---|---|---|
| Pre-injection (pilot) | Low rail pressure, 0.5-1.5ms pulse width | Delivery volume (mm³/stroke), injection delay | Within ±10% of specification |
| Main injection — idle | 300-400 bar, 0.5-0.8ms | Delivery volume, cylinder-to-cylinder balance | Within ±5% across all injectors in set |
| Main injection — full load | 1,600-2,000 bar, 1.5-2.5ms | Maximum delivery volume | Within ±5% of rated spec |
| Post-injection | Medium pressure, short pulse after main event | Delivery volume, timing accuracy | Within ±15% of specification |
| Back-leakage test | Maximum rail pressure, injector closed | Internal return flow rate (ml/min) | Below manufacturer maximum (typically 25-45 ml/min) |
| Response time | Multiple pulse width sweeps | Electrical-to-hydraulic delay (microseconds) | Within ±15µs of nominal |
| Minimum delivery | Shortest controllable pulse | Smallest reproducible injection quantity | Must be ≤ specified minimum (typically 1-2 mm³) |
Stage 4: Spray Pattern Analysis
Even if an injector delivers the correct volume of fuel, a poor spray pattern destroys combustion efficiency. Professional test benches use high-speed cameras or stroboscopic imaging to visualize the spray cone at different injection pressures:
What a Healthy Spray Pattern Looks Like
- Symmetrical cone: All nozzle holes produce evenly spaced, identical spray plumes
- Proper atomization: Fine mist with no visible droplets or “streaming” — poor atomization means liquid fuel hits cylinder walls
- Correct penetration: Spray reaches the combustion bowl without impinging on cylinder walls
- No dribble: Clean needle closure with no post-injection fuel leakage
Spray Pattern Defects and Their Causes
| Defect | Appearance | Likely Cause |
|---|---|---|
| Streaming/stringing | Solid stream instead of mist from one or more holes | Partially blocked or eroded nozzle hole; needle not seating properly |
| Asymmetric spray | Uneven plume lengths or missing plumes | Uneven hole wear, partial blockage, or damaged needle guide |
| Dribble/after-injection | Fuel droplets after needle closure signal | Worn needle seat, weak return spring, or carbon on seat |
| Excessive penetration | Spray extends beyond normal combustion bowl reach | Nozzle hole erosion (enlarged holes from cavitation) |
| Hollow cone | Fuel concentrated at cone edges, empty center | Sac volume design issue or deposit buildup at hole entry |
Stage 5: Flow Matching & Calibration
This is where testing becomes calibration. For multi-cylinder engines, matching injectors to within tight delivery tolerances is critical for smooth operation, fuel economy, and emissions compliance.
The Flow Matching Process
- Test all injectors individually at multiple operating points (idle, part load, full load)
- Group injectors into matched sets — typically 6 for inline engines, 4 or 8 for V-configurations
- Maximum deviation within a set: Usually ±3-5 mm³/stroke at full load, ±1-2 mm³/stroke at idle
- IMA/Trim codes: Modern Bosch, Denso, and Delphi injectors carry a calibration code (IMA code) printed on the solenoid body. This 7-16 character alphanumeric code tells the ECU the injector’s individual flow characteristics
- ECU coding: After installation, the IMA code must be programmed into the ECU using a diagnostic tool. Without this step, the ECU uses default calibration values — usually close, but not optimal
Why Flow Matching Matters
A 5% flow imbalance between cylinders at full load translates to roughly a 5% power imbalance. In a 400 HP engine, that’s one cylinder producing 20 HP less than its neighbors. The result? Vibration, increased bearing wear, potential DPF clogging from incomplete combustion, and higher fuel consumption as the ECU compensates with extra fuel to the weak cylinder.
Stage 6: The Test Report — Reading the Numbers
Every professionally tested injector ships with a test report. Here’s how to read one:
| Field | What It Tells You | What to Look For |
|---|---|---|
| Injector part number & serial | Identity verification | Must match your order and engine requirements |
| IMA/Trim code | Calibration code for ECU programming | Must be clearly printed and legible |
| Idle delivery (mm³/stroke) | Fuel quantity at idle conditions | All injectors in set within 1-2 mm³ |
| Full load delivery (mm³/stroke) | Maximum fuel delivery capacity | Within ±5% of OEM specification |
| Back-leakage (ml/min) | Internal fuel return flow | Below manufacturer maximum; a trend of increasing values with repeated tests suggests wear |
| Response time (µs) | Electrical-to-hydraulic delay | Within ±15µs of nominal for matched sets |
| Spray pattern evaluation | Pass/Fail or detailed visual assessment | Must say “Pass” or “Acceptable” |
| Test date & technician ID | Traceability | Should be recent (within warranty period) |
Common Questions About Injector Testing
Can injectors be tested on the engine?
Partially. You can perform a return flow test (also called a back-leakage test) on the vehicle using graduated bottles to measure how much fuel each injector returns to the tank. This tells you if an injector is worn but doesn’t measure delivery accuracy or spray quality. On-engine testing is a screening tool, not a substitute for bench testing.
How long does professional injector testing take?
A complete test cycle for one injector takes approximately 15-20 minutes. This includes mounting, warm-up, multiple test points, spray pattern evaluation, and report generation. A set of 6 injectors typically requires 2-3 hours from start to finished report.
How much does professional testing cost?
Testing-only (no repairs) typically costs $25-45 per injector at an independent diesel injection shop. Full testing with reconditioning (new nozzle, seals, calibration) ranges from $125-350 per injector depending on the injector type and required parts.
What’s the difference between testing and remanufacturing?
Testing evaluates the current condition. Remanufacturing disassembles the injector, replaces all wear components (nozzle, control valve, seals, sometimes solenoid), reassembles to factory specifications, and then tests and calibrates. A tested injector might have 200,000 miles of wear. A remanufactured injector has zero miles of wear on all critical components.
Products That Rely on Professional Testing
At JS Parts Online, every injector we supply undergoes professional testing and calibration. Browse our catalog of premium diesel injectors:
- Caterpillar Fuel Injectors — Premium OEM-quality replacements for CAT C7, C9, C13, C15, 3508, 3512, and 3516 engines
- Bosch Diesel Injectors — Common rail injectors for Cummins, Volvo, Detroit Diesel, and Mercedes applications
- Denso Diesel Injectors — High-performance injectors for Hino, Isuzu, and Toyota diesel engines
Conclusion
Professional injector testing is what separates a quality reman from a cleaned-up core. The test bench reveals what the naked eye cannot: delivery accuracy, spray quality, response time, and internal leakage. When you buy a tested and calibrated injector, you’re not just buying a part — you’re buying verified performance data that guarantees that injector will perform as engineered.
At JS Parts Online, we work exclusively with ISO-certified testing facilities that use CR819, Bosch, and Hartridge test benches. Every injector ships with a detailed test report. Because in diesel injection, the numbers don’t lie — and neither should your supplier.





JSPartsonline:
Focus on injectors for 12 years,We sell high-quality fuel injectors at competitive prices.
Copyright 2025 © YUN·X . All right reserved.
