How to Rebuild a Diesel Fuel Injector — Complete Overhaul and Component Replacement Guide
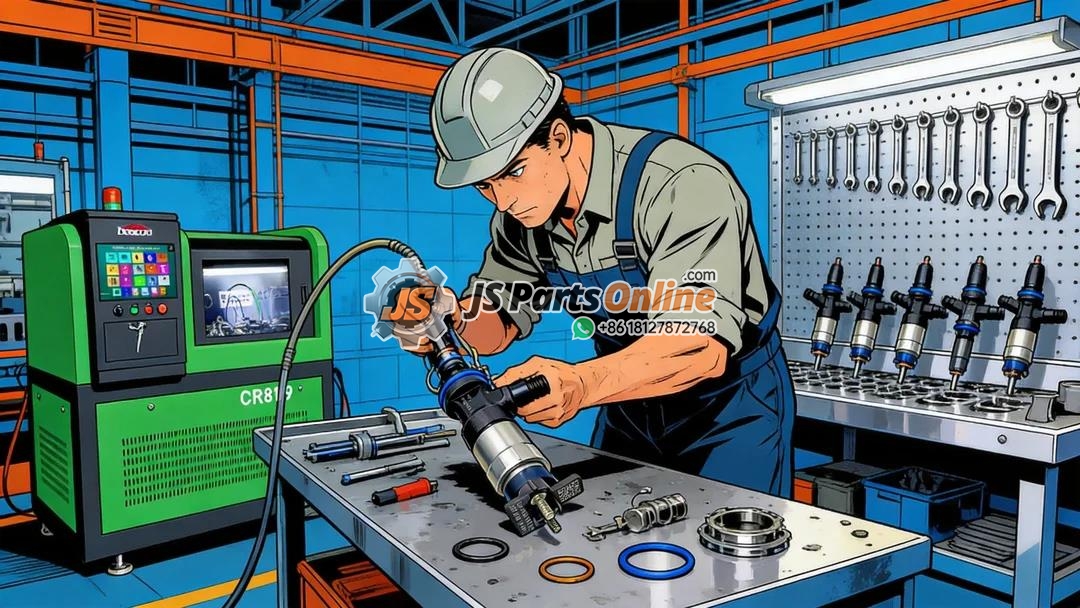
When a diesel fuel injector fails, replacement isn’t always the only option — and it’s often not the most cost-effective one. Rebuilding a diesel fuel injector can restore it to like-new performance at a fraction of the cost of a new injector, especially for high-value injectors used in heavy-duty applications. In the image above, a diesel injection technician works at a workbench surrounded by injectors in various stages of disassembly and testing — a typical scene in any professional injection shop. This guide walks you through the complete injector rebuilding process, from initial inspection through final calibration on the test bench. Whether you’re rebuilding a Bosch CRIN injector, a Denso HP4, a Delphi injector, or a CAT common rail injector, these procedures apply across virtually all modern designs.
Should You Rebuild or Replace?
Not every failed injector can or should be rebuilt. Here’s how to decide:
| Condition | Rebuild? | Reasoning |
|---|---|---|
| Worn nozzle tip (eroded spray holes, carbon buildup) | ✅ Yes | Nozzle replacement is standard — cost-effective and reliable |
| Internal plunger/barrel wear (excessive back leakage) | ✅ Yes | Plunger/valve assemblies are replaceable service parts |
| Failed solenoid (open or short circuit) | ⚠️ Depends | Solenoid coils are replaceable on some injectors; others require a complete injector |
| Cracked injector body | ❌ No | Body damage is structural — injector must be replaced |
| Severe corrosion (pitting, rust on precision surfaces) | ❌ No | Corrosion destroys the surface finish of precision-mated parts |
| Failed piezo stack actuator | ⚠️ Rarely | Piezo stacks are expensive and require specialized tools; often uneconomical to replace |
| High miles but running acceptably (preventive rebuild) | ✅ Yes | Preventive rebuilding at 300,000–500,000 miles is cost-effective for fleet operators |
Tools and Equipment Needed
Professional injector rebuilding requires specialized tools that go well beyond standard mechanic’s tools. Here’s what you’ll need:
Essential Tools
- Injector holding fixture — A purpose-built vise or clamp that holds the injector securely without damaging the body
- Torque wrenches — Both inch-pound and foot-pound ranges, calibrated and certified
- Precision screwdrivers and picks — For removing O-rings, snap rings, and small components
- Hex keys (Allen wrenches) — Metric sizes, especially for nozzle retaining nuts and cap screws
- Socket set — Deep sockets for nozzle nuts and injector retaining bolts
- Digital calipers and micrometer — For measuring shims, needle lift, and component tolerances
- Ultrasonic cleaner — For cleaning injector components without abrasive damage
- Magnifying lamp or stereo microscope — For inspecting precision surfaces and nozzle orifices
Specialized Rebuild Supplies
- Replacement nozzle assemblies — Matched nozzle needles and bodies, specific to each injector model
- O-ring and seal kits — Complete sets of Viton or PTFE seals for the injector
- Calibration shims — Assortment of precision-ground shims in 0.01mm increments
- Filter screens — Replacement inlet and outlet screens
- Anti-seize compound — For nozzle nut threads to prevent galling
- Assembly lubricant — Clean diesel fuel or ISO 4113 calibration oil
- Thread locker — Medium strength (Loctite 242 or equivalent) for specific applications
Diagnostic Equipment
- Common rail injector test bench — For pre-teardown and post-rebuild testing (see our test bench guide)
- Digital multimeter — For solenoid resistance and insulation testing
- Pop tester (hand pump) — For basic nozzle opening pressure verification
The Complete Injector Rebuild Process
Phase 1: Pre-Rebuild Testing and Documentation
Before disassembling anything, test the injector on the bench and document its current performance. This serves two critical purposes: it confirms the problem so you know what to fix, and it provides baseline data for comparison after the rebuild.
- Record injector identification: Part number, serial number, Bosch IMA code (if applicable), and any service history
- Measure and record: Injection quantity at idle, partial load, and full load; back leakage volume; opening pressure; solenoid resistance; spray pattern quality
- Photograph the injector in its as-received condition — this is important for warranty documentation
- Compare measured values against manufacturer specifications to identify which parameters are out of spec
Phase 2: Disassembly
Injector disassembly must be performed in a surgically clean environment. A single grain of dust can damage precision-mated surfaces and cause the rebuilt injector to fail.
- Clean the exterior: Wipe the injector body with a clean, lint-free cloth soaked in solvent. Do not use compressed air near precision surfaces — it can embed particles
- Remove the nozzle nut: Secure the injector body in the holding fixture. Loosen and remove the nozzle retaining nut using the appropriate socket. On some injectors, this nut is torqued to 60–100 Nm and may require heat to break the thread locker
- Extract the nozzle assembly: Carefully remove the nozzle needle and nozzle body. Place them immediately in a parts tray filled with clean diesel fuel — never let precision-ground surfaces air-dry
- Remove the solenoid or piezo actuator: For solenoid injectors, remove the retaining ring or cap, then extract the coil assembly. For piezo injectors, remove the actuator module as a complete unit
- Remove the control valve assembly: Extract the control plunger, spring, and valve plate. Note the orientation of each component — some are asymmetrical and must be reinstalled in the same position
- Remove shims and spacers: Extract all shims and spacers, keeping them in labeled containers. Their thickness and position are critical for proper calibration
- Remove all O-rings and seals: Use a plastic pick to avoid scratching the O-ring grooves. Note the size and position of each seal for replacement
Phase 3: Cleaning and Inspection
Every component except the O-rings and seals must be cleaned, inspected, and either reused or replaced. The level of cleanliness required cannot be overstated — we’re working with tolerances measured in micrometers (1/1000th of a millimeter).
Cleaning
- Place all metal components (except the solenoid and piezo actuator) in an ultrasonic cleaner
- Use a professional-grade injector cleaning solution — never use water-based cleaners on precision fuel system components
- Run the ultrasonic cleaner at 40–50°C for 10–15 minutes
- Remove components and rinse with clean diesel fuel or calibration oil
- Dry with filtered, oil-free compressed air at low pressure
- Solenoid and piezo components — clean only with a lint-free cloth lightly dampened with solvent. Do not submerge piezo actuators in any liquid
Inspection Checklist
| Component | Inspect For | Pass / Fail Criteria |
|---|---|---|
| Nozzle needle tip | Erosion, pitting, ring wear, carbon deposits | Replace if any visible wear — nozzles are consumable |
| Nozzle body spray holes | Ovalization, erosion, partial blockage, edge rounding | Replace if any hole shows wear beyond 10% of original diameter |
| Nozzle needle guide surface | Scoring, galling, discoloration from overheating | Replace — guide damage causes needle sticking |
| Control plunger | Scratches, burrs, edge wear on metering edges | Replace if any surface defect visible under 10× magnification |
| Valve plate / seat | Pitting, erosion, witness marks from debris | Replace if any damage to the sealing surface |
| Spring | Height (free length), squareness, cracks, corrosion | Replace if free length is below spec, or any surface defect visible |
| Shims | Burrs, bends, uneven thickness | Replace with new shims — old shims work-harden and lose accuracy |
| Injector body bore | Scratches, corrosion, wear, debris | If damaged, injector is not rebuildable — body is non-serviceable |
| Solenoid coil | Resistance vs. spec, insulation to ground, visible damage | Replace if resistance deviates > 10% or insulation is low |
| Piezo actuator | Capacitance, charge/discharge behavior, cracks in ceramic stack | Replace if capacitance is out of spec or actuator shows physical damage |
| Electrical connector pins | Corrosion, bent pins, broken locking tabs | Replace connector or pin assembly if damaged |
| O-ring grooves and seal surfaces | Scratches, burrs, corrosion, debris | Polish with 1000-grit if minor; replace injector body if damaged |
Phase 4: Parts Replacement
Based on your inspection findings, replace all worn or damaged components. At minimum, most professional rebuilds include the following new parts:
- Nozzle assembly — Always replace. Even if the old nozzle looks good, its internal clearances have widened with use
- O-ring kit — All O-rings, seals, and gaskets. Always. Never reuse O-rings on a rebuilt injector
- Filter screen — The inlet filter screen traps debris that could damage the injector internally
- Calibration shims — New shims for all adjustable clearances
- Control plunger assembly — Replace if there’s any sign of wear. Some shops replace these as a matter of course
Phase 5: Reassembly
Reassembly follows the exact reverse of disassembly, but with critical attention to cleanliness, torque specifications, and shim selection.
- Install new O-rings: Lubricate each O-ring with clean diesel fuel or assembly lubricant before installation. Never install a dry O-ring — it can roll, twist, or be cut during installation
- Install new filter screen: Seat the screen firmly in its bore using a plastic drift
- Position new shims: Use the shim thicknesses recorded during disassembly as a starting point. Final shim selection will be determined during calibration
- Install control valve assembly: Ensure proper orientation of the valve plate — most have alignment marks or keyways
- Install solenoid or piezo actuator: Verify correct electrical connection orientation. Torque the retaining nut or cap to manufacturer specification
- Install new nozzle assembly: Place the nozzle needle in the nozzle body, then insert the assembly into the injector body. Apply anti-seize compound to the nozzle nut threads. Torque the nozzle nut in stages to the manufacturer’s specification — this is typically 60–100 Nm depending on the injector model
Phase 6: Post-Rebuild Calibration and Testing
This is the most critical phase. A rebuilt injector must be calibrated on a test bench to verify that all parameters meet manufacturer specifications.
- Mount the rebuilt injector on the test bench using the correct adapter
- Warm up the injector — run at low pressure/frequency for 60 seconds
- Check for external leaks — no fuel should escape from any seal or joint
- Run the full test sequence: Measure injection quantity at all test points (idle, partial load, full load, maximum)
- Compare against specification: If flow rates are within ±2%, the rebuild is successful
- If flow is out of spec: Adjust shim thickness and re-test. Changing the shim under the spring by one size (0.01mm) typically changes flow by 1–2%. Repeat until flow is within spec
- Verify spray pattern: Use the test bench’s viewing window to confirm a clean, symmetrical spray cone with no streaks or drips
- Measure back leakage: Confirm return flow is below the maximum specification
- Re-test solenoid or piezo electrical parameters: Verify resistance, inductance, or capacitance match specifications
- Run a final verification test: A complete 5-point test to confirm all parameters are stable and within tolerance
- Record and print the test report for documentation and warranty purposes
Common Rebuild Mistakes to Avoid
| # | Mistake | Consequence | Prevention |
|---|---|---|---|
| 1 | Reusing old O-rings | Fuel leaks, air intrusion, injector failure | Always use a complete new seal kit |
| 2 | Mixing up shims between injectors | Each injector in a set will have different flow rates | Keep each injector’s components in labeled containers |
| 3 | Incorrect nozzle nut torque | Under-torque = leaks; over-torque = distorted nozzle body | Use a torque wrench with known calibration |
| 4 | Contamination during assembly | Particles cause rapid wear of precision surfaces | Work in a clean room or dedicated clean bench area |
| 5 | Skipping the pre-rebuild test | You won’t know if the rebuild actually fixed the problem | Always test before and after — document everything |
| 6 | Dry O-ring installation | O-ring rolls, twists, and fails immediately | Lubricate every O-ring with clean diesel fuel before installation |
| 7 | Using the wrong test fluid | Incorrect viscosity changes flow results | Always use ISO 4113 calibration oil |
| 8 | Replacing only the nozzle and nothing else | Partial rebuild — other worn parts will fail soon | Inspect and replace all worn components, not just the obvious ones |
| 9 | Incorrect IMA code programming | ECU wrong fuel correction, rough running | Verify new IMA code on the test bench before sending the injector out |
| 10 | Skipping the post-rebuild break-in period | Initial flow readings may shift after the first hour of operation | Run the injector on the bench for 5+ minutes before taking final measurements |
When to Seek Professional Help
While this guide provides a comprehensive overview of the injector rebuilding process, the reality is that many factors affect rebuild quality:
- Access to a properly maintained common rail injector test bench
- Availability of manufacturer-specific rebuild kits and shim assortments
- Experience with different injector designs (Bosch CRIN, Denso HP3/HP4, Delphi F2P/F2E, CAT common rail)
- Clean room conditions for assembly work
- Up-to-date specification data for the injector models you’re rebuilding
If you lack any of these resources, consider sending your injectors to a professional diesel injection shop. The cost of a professional rebuild ($75–$250 per injector depending on the model) is a fraction of the cost of a replacement injector ($300–$1,200+), and a properly rebuilt injector carries the same warranty as a new one from most reputable rebuilders.
Conclusion
Rebuilding a diesel fuel injector is a precision task that demands the right tools, a clean workspace, meticulous attention to detail, and access to a calibrated test bench for verification. When done correctly, a rebuilt injector performs identically to a new one at 50–70% less cost. The process — pre-test, disassembly, clean and inspect, replace worn parts, reassemble, calibrate, and verify — is well-established and has been proven across millions of injectors in service worldwide. Whether you’re performing a single injector rebuild in your own shop or scaling up to offer injector rebuilding as a service, the standards are the same: cleanliness, precision, and verification. Always test before you rebuild and test again after. The test bench doesn’t lie, and a complete test report is the only way to guarantee the quality of your work.
Need replacement Bosch injectors, Denso injectors, or CAT injectors for your diesel engine? Visit JSPartsonline for a full selection of new and rebuilt options.




JSPartsonline:
Focus on injectors for 12 years,We sell high-quality fuel injectors at competitive prices.
Copyright 2025 © YUN·X . All right reserved.
